
The Best Guide to Hosting a Styled Shoot
Are you ready to dive headfirst into the exhilarating world of styled shoots? If you’re a creative soul, wedding venue, a photographer, a wedding planner, or just someone with a flair for design, you’re in for a treat! Hosting a styled shoot is like unleashing your imagination and watching it come to life in vibrant colors, captivating setups, and breathtaking backdrops. So, buckle up, because we’re about to embark on a journey to create magic!
Hosting and participating in a styled photo shoot can be really beneficial to your career because it allows you opportunities to stretch your skills, showcase other styles, and network with other vendors in your area. And you don’t even have to be a photographer or event planner to initiate and plan a successful styled shoot!
As a venue, we have both led and have participated in a lot of styled shoots that have been wonderful and some that were not so great. We have even had shoots that were not enjoyable to be a part of but still got picked up by major publications. So it’s worth putting yourself out there and putting in the hard work to make your own shoot. But we hope with this guide with actionable steps – where we may save you some frustration, set you up for success, and just get you to the fun part.
Step 1: Strategize your Styled Shoot
This step is too often skipped! It should be the first step of every shoot in my opinion and it’s often skipped in other guides you may read. We recommend you start with defining your overall strategy or goal. The overall goal of a styled shoot and its strategy may change with every styled shoot you do, so come back to this step early and often. If your business is brand new, and you just need imagery that fits your style and ideal clientele. The goal may just be creating any and all content. As your business matures, you will likely be craving more creative challenges, seeking more specific publication opportunities, or looking for ways to collaborate with specific vendors.
Questions to ask yourself:
- How do I want this styled shoot to grow my skills as a creative?
- Is there a certain idea or concept I have been trying to create opportunities for that could be apart of this?
- Is this going to be an editorial shoot or more reflective of a real event like a wedding?
- What kind of event am I trying to capture, a wedding day, bachelorette party, a high school graduation, or something else?
- Am I trying to build backlinks on google and social media?
- Who would I want to share my content? Do they have a specific style or requirements to be included?
- Which vendors would I love to work with?
- Who have I never worked with before that would be good to collaborate with?
- Who is leading this shoot? Is it me, or is there a planner in the area that could be involved?
Step 2: Dream Big, Then Dream Even Bigger
Styled shoots are your chance to let your imagination run wild, like a pack of wild horses galloping through a field of creative possibilities. Start by brainstorming a theme that speaks to your soul – whether it’s a vintage carnival, a whimsical forest wonderland, or an elegant black-tie affair. The key here is to dream big and let your creative juices flow freely.
I often save ideas from Instagram and a Pinterest board that have had details or concepts that have inspired me and that I would like to come back to again. This can help give me a visual direction. And some times just jot down random thoughts into the notes app on my phone. Then when I am ready to start planning a shoot, I can look through and pull out little details and things I want to expand on. Sometimes, I feel like there is a gap in my marketing materials and filling that gap can help guide the shoot too! If you’re struggling with inspiration – look to a favorite song. Pull inspiration from the lyrics, music video, or the musician and go from there.
And, to really let your creative muscles flex – put a mad-libs type prompt on your instagram stories and build a concept from your followers submissions. This may take you in a direction and out of your comfort zones in ways you might not have otherwise. With the added bonus of being able to create content along the way of how you gathered ideas from the submission, through the planning process, and then through the final results.
Step 3: Assemble Your Dream Team
Just like assembling the Avengers, your styled shoot requires a dream team of talented individuals who share your passion. Reach out to photographers, rental company, makeup artists, florists, models, wedding dresses shops, and anyone other ideal vendors else who can contribute their expertise to bring your vision to life. This vendor list is going to be key for creating great content! Collaborating with fellow creatives not only enhances the final product but also makes the entire process a ton more fun.
Professional models are not always an option or required for your dream team. But you’ll want to seek out models that are comfortable on camera, and have an overall vibe or aesthetic that fits the shoot. Models are a great way to add variety to your portfolio and allow your ideal clients to see themselves in your work. If you are struggling to find models, post a model call in local groups or you may want to look back to couples from a real wedding that were comfortable and natural being photographed. Professional or not, the models will likely need to sign a model release and that is often coordinated by the photographer but required for publication.
As your assembling your team, make sure you’re introducing the group in advance, collecting any social media or website handles, and any requested items for the shot list. For example, an event decor company may want a photo of a few items together to be able to share the launch of a new collection. Everyone should have the goal going into the shoot day to create content that the rest of the vendor team can use and share. You’re all in this collaboration together – capture behind the scenes cellphone footage or help photographers get a certain shot.
Set Expectations Early
I also like to set certain expectations with the vendors, mostly that they must tag all vendors in the shoot. But you may want to add to the expectations with details that are specific to the shoot – like must be out of the location by certain time, share certain content, and other pertinent details.
Paid or Not?
Some styled shoots are sold to a group of photographers as a way to build a portfolio. These photographers often pay a lead photographer to participate and learn from the lead photographer. This is a growing trend but not a requirement of a styled shoot. If you are hosting a paid styled shoot, make sure your vendors are also fairly compensated and that they know it’s a paid experience. If they are not being compensated monetarily, make sure they know the trade off and they are able to make the decision if they want to be involved or not. It does not do well for vendor relationships when they find out on the shoot day or after, that their hours of work were not valued to the same level as others.
Bonus Tip
Involve more than one photographer. Having 2 photographers allowed 2 different focuses and styles of photography to capture the sets. My preference is having 1 photographer dedicated to capturing the intended photo shoots and the other photographer is more dedicated to the behind the scenes details. Capturing the florist placing the final flowers, or the other photographer at work, and other details like that. This truly gives you a full range to pull from for content! Just make sure both photographers are aware and excited about the role they get to play.
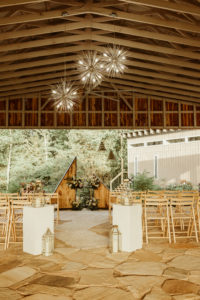
Step 4: Location, Location, Location
Your chosen location is the canvas upon which your masterpiece will be painted. Whether it’s an enchanting garden, a cozy loft, or an abandoned warehouse – make sure the right venue it aligns with your theme. Scout different locations, consider lighting conditions, and envision how your setups will interact with the space.
While we have the advantage of having our built in location as a venue, Juniper Gardens, we often think about our location different. Can we show a different side of this space? What is under utilized or new in the space? These can also be questions you can be asking yourself once you have selected a location, even if it is new to you.
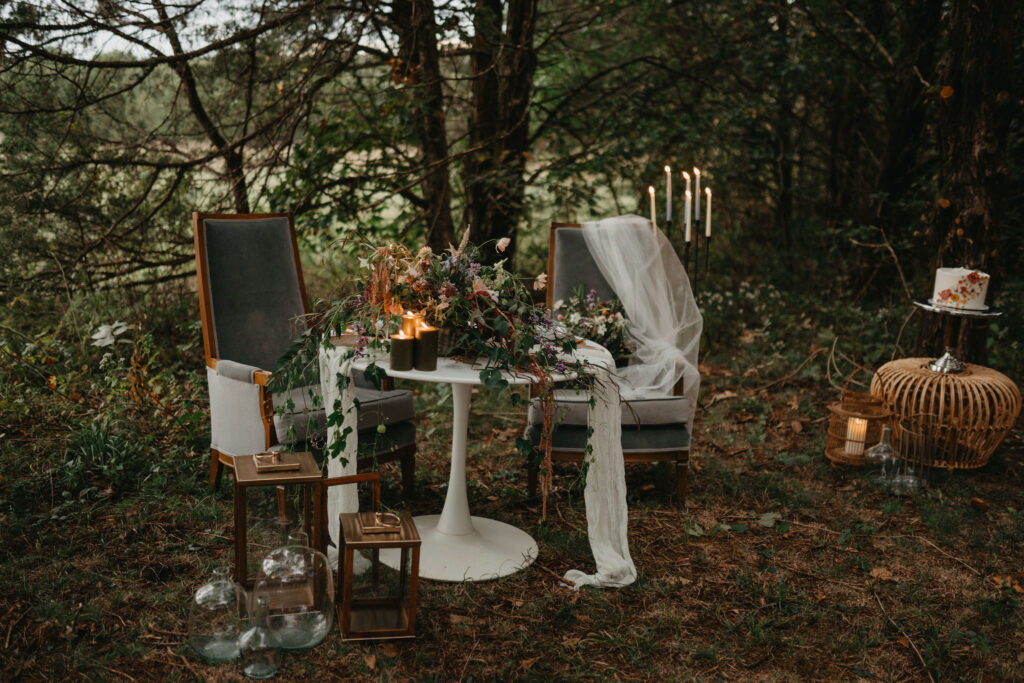
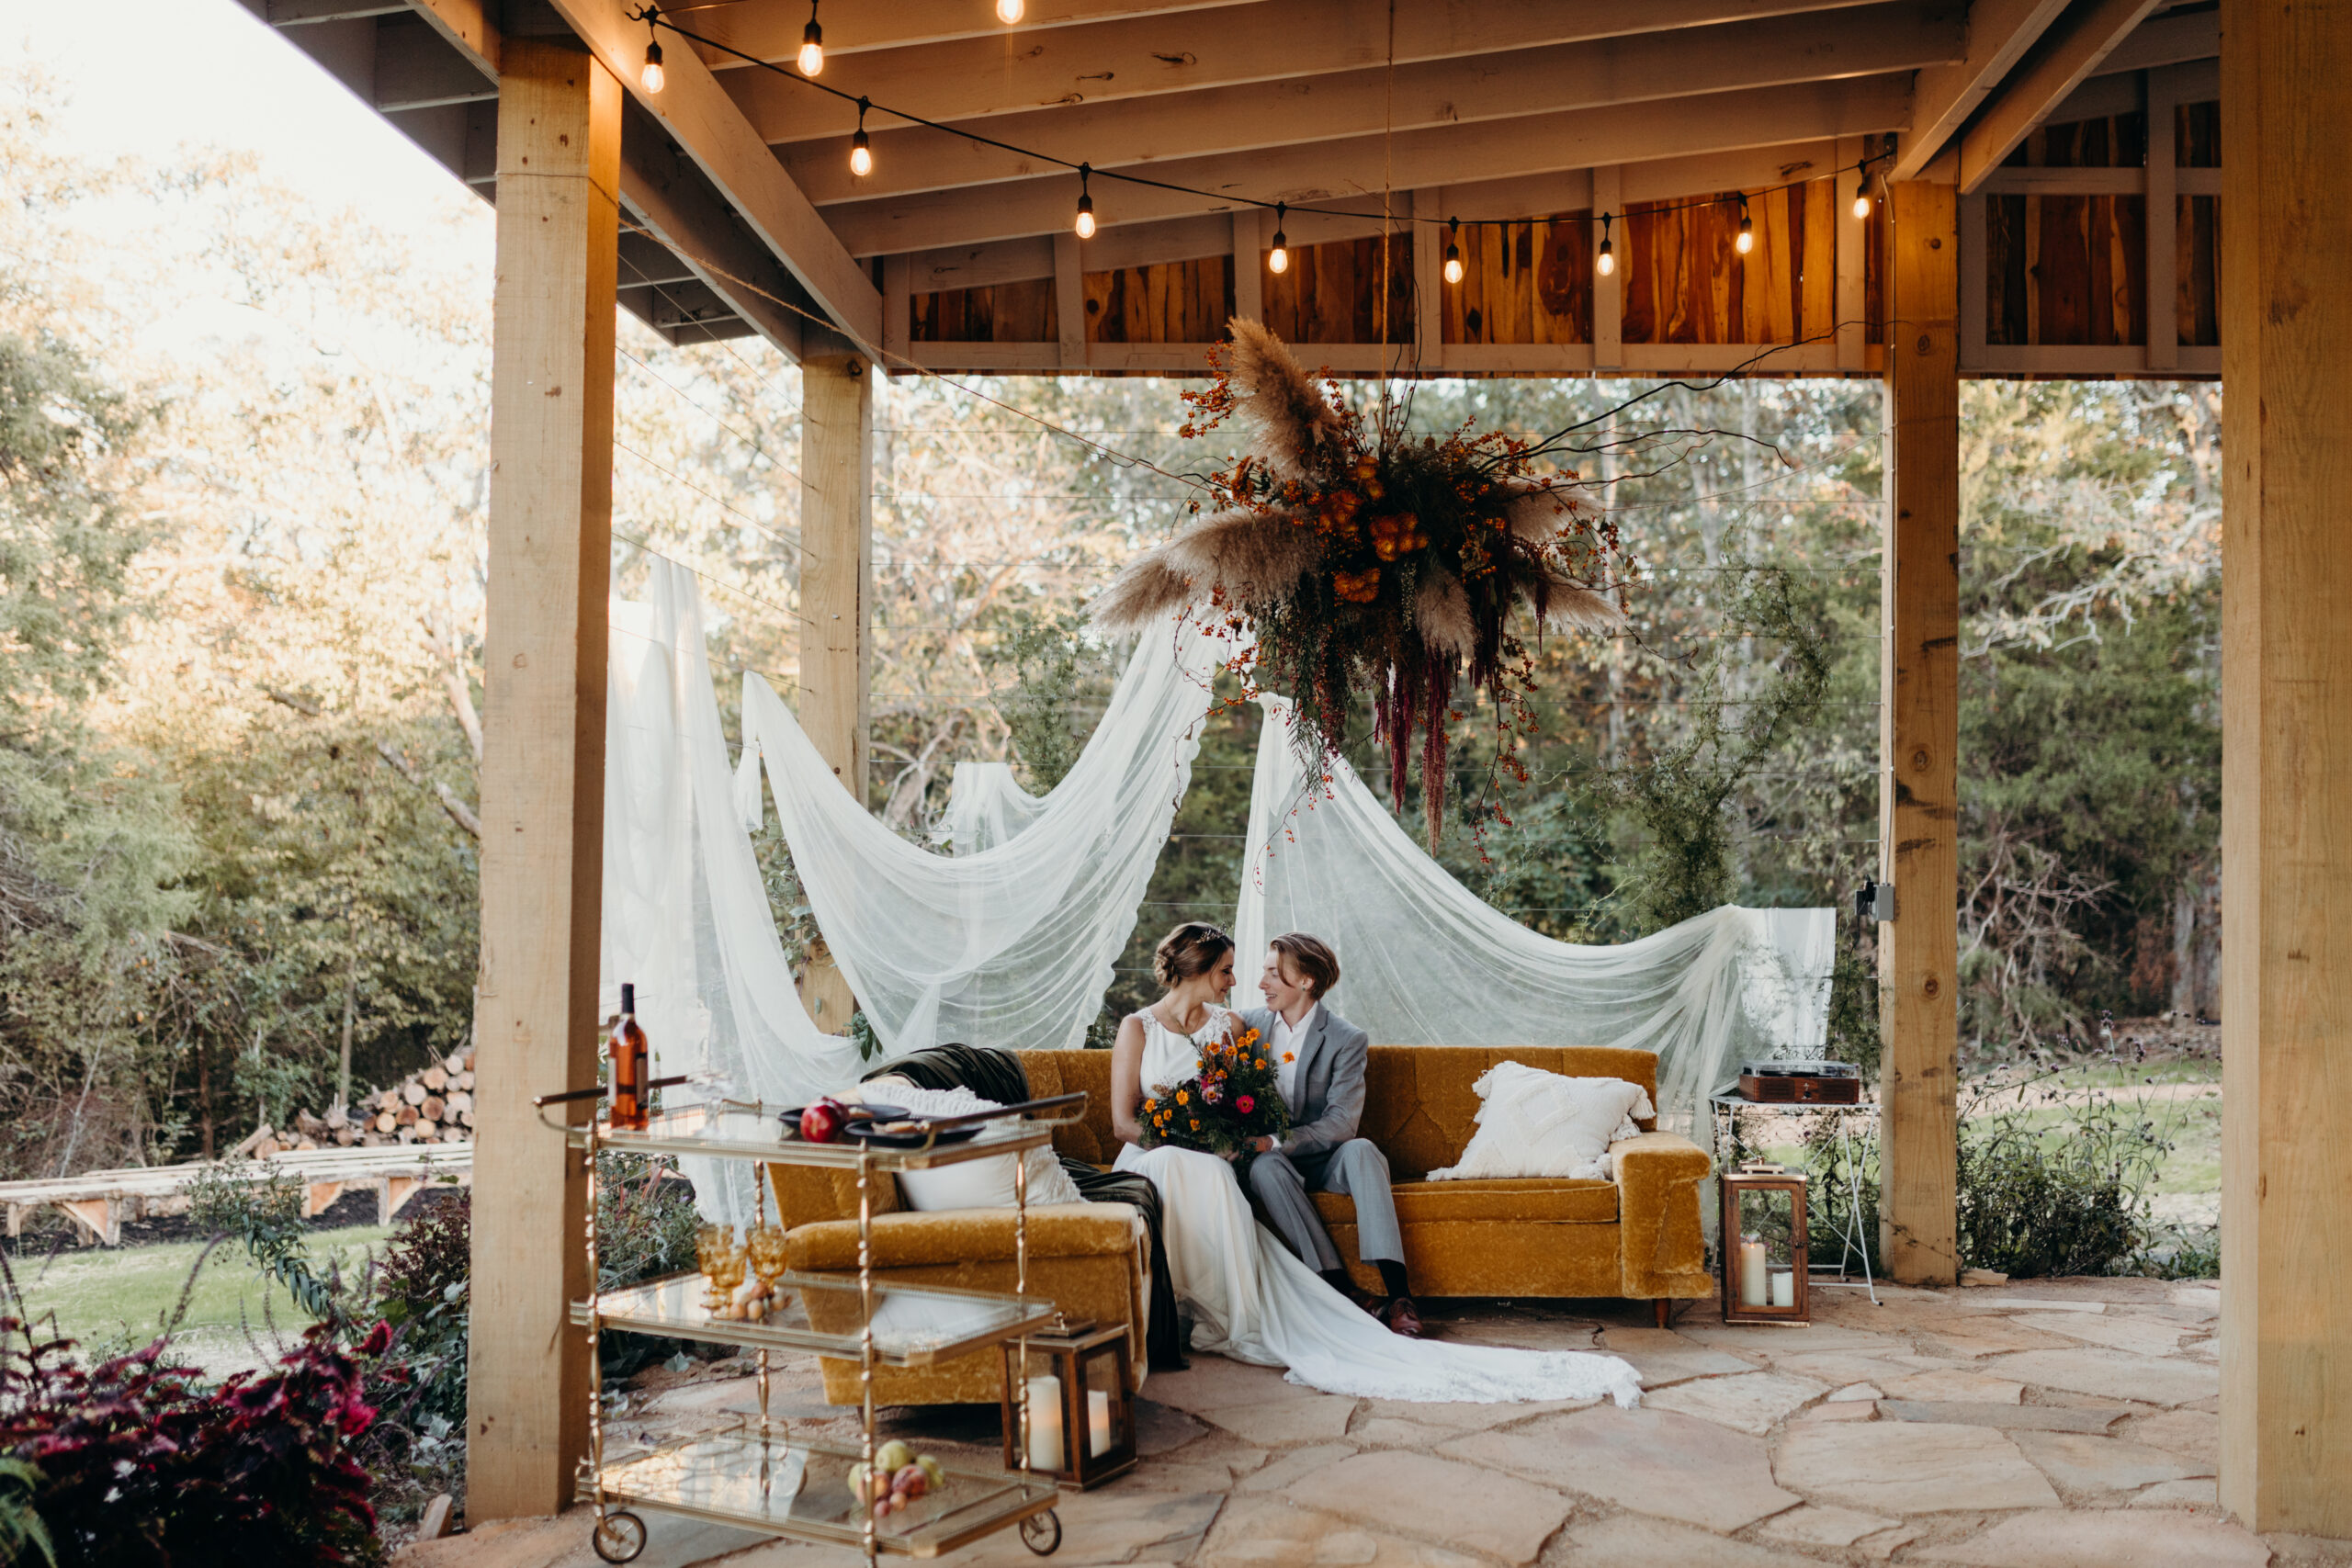
Step 5: Design Like There’s No Tomorrow
Now comes the heart-pounding part – the design! Select color palettes, choose decor elements, and pick props that harmonize seamlessly with your theme. Are you aiming for a boho-chic vibe? Grab those macramé hangings and dreamcatchers. Going for a classic elegance? Think candlelit centerpieces and luxurious fabrics. The sky’s the limit! If your vendor team includes the event designer, they may be running with this step and pulling it all together.
Tools like Canva make it easy to put all the design elements together in one image, and then use a color picker tool to finalize any color palettes. Even the free version of Canva will have a lot of options for you. Work through the elements of good design – color, line, shape, form, and texture. Definitely don’t forget the texture!
Putting all these details together in a board can help you refine the design, create shopping list, and have more specific request for your vendors. Don’t forget to share it with them! If you are still needing to fill specific vendor categories, it may be easier to do so once you can share the mood board and fleshed out concept to the vendor.
And, you’ll bring in the aesthetics a-game! Styling isn’t just about throwing pretty things together; it’s about creating an atmosphere that tells a story. Coordinate outfits, plan hair and makeup looks, and finesse every detail to ensure the aesthetics are on point. Don’t be afraid to experiment – a little sparkle here and a touch of whimsy there can make all the difference. Throw in something unexpected or funny, depending on your overall goal for the shoot.
Step 6: Prep for the Styled Shoot
As you have collected any shot requests from vendors and listed other details you would like captured, you’ll want to work with the photographer to create a list of specific photos, often referred to as a shot list. This could be as small as a few items or a longer list. But you’ll also want to leave room for the photographer to work in the moment and with the lighting. You may want to save the shot list for just those priority items that you don’t want to miss.
Then compile a timeline for the day. Make sure you build in time for snacks and water breaks!
Arguably, the most important step. Right before the shoot, send an email to the vendor team with the mood board, timeline, and a list of vendors and their social media accounts to tag for all vendors. This task may be done by an event planner, or the styled shoot host. This saves from awkward moments of vendors scurrying around to confirm tags, or worse, not tagging anyone at all.
Then you’ll want to pack up any materials needed for the shoot that you may have ordered or collected from other vendors. Having your boxes organized for each set helps save time on the set, where they day always goes by faster than expected. Such as a box for flat lay details, or tablescapes, etc.
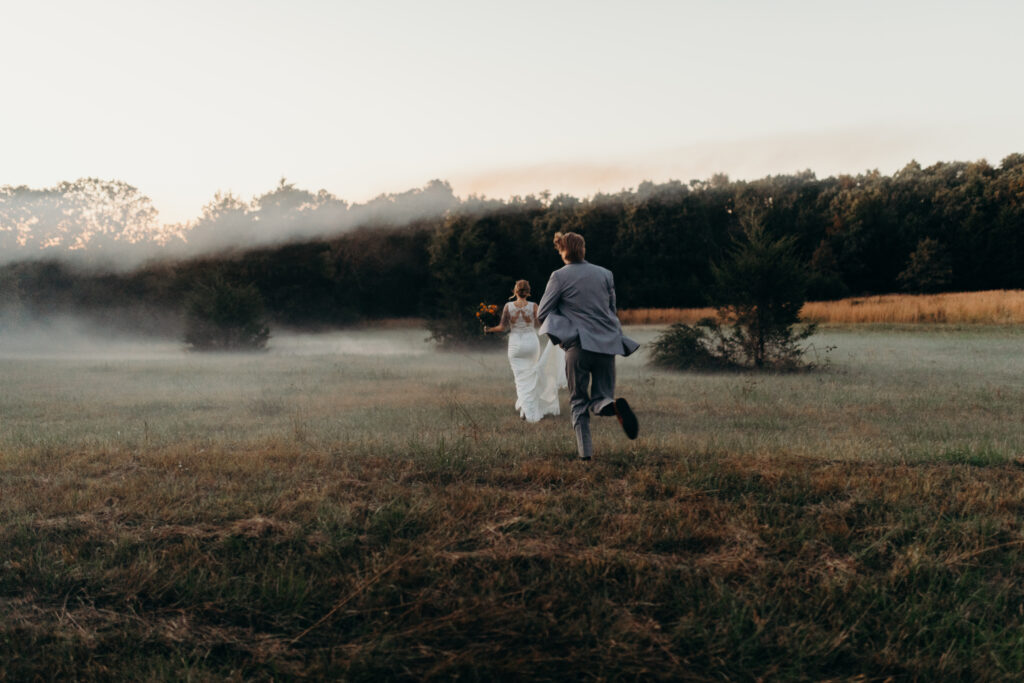
Step 7: Capture the Styled Shoot Magic
Lights, camera, action! Your dream team of photographers will work their magic to capture the essence of your styled shoot. Encourage them to experiment with angles, lighting, and compositions to truly showcase the beauty you’ve meticulously crafted. Remember, these photos will be the crown jewels of your portfolio.
Take the time to capture behind the scenes photos or videos with your cellphone too to share the moments throughout the day. You’ll be glad you did! Jot down any funny quotes or moments from the shoot too in a note on your phone. This gives you a lot more to pull from when you write a blog post about the shoot or prepare the article for publication. It’s easier to do in the moment than try to recall later.
Step 8: Spread the Magic Dust
Once you’ve collected your treasure trove of gorgeous photos, it’s time to share the love! Use social media, your website, and relevant platforms to showcase your styled shoot. It’s your chance to shine, so don’t hold back. Who knows? Your work might catch the eye of potential clients, collaborators, or even feature in a magazine.
And mostly, you did it – you brought your wildest dreams to life! Take a moment to enjoy and celebrate your achievement, and bask in the glow of your creative prowess. Hosting a styled shoot isn’t just about the final result; it’s about the journey, the friendships formed, and the memories made.
So there you have it, dear creative genius – your ultimate guide to hosting a spectacular styled shoot. Now, go forth and conquer the world with your imagination, flair, and unbridled passion. The canvas is waiting – it’s time to paint your masterpiece!
If this helped you create your dream styled shoot, we would love to hear about it and share your success. DM us on instagram at www.instagram.com/junipergardens417
September 6, 2023
Leave a Reply


")


Hosting Garden Weddings for Nature Lovers
Fair Grove, Missouri
Connect
Blog
Read the
Privacy Policy
FAQ
Copyright 2020 Juniper Gardens LLC
Social Media Links

Thank you for all the useful information!